Speed Up WordPress Websites Instantly Using These 5 Tips
Just about every publisher, webmaster, and blogger that leverages WordPress has spent hours combing over different ways to speed up their site. Website speed is connected to important things like SEO, ad revenue, and visitor experiences. Unfortunately, finding some actionable ways to speed up a WordPress website can be hard to do.
If you spend a few minutes searching the web on how to speed up a WordPress site, you’re likely to shrug your shoulders wondering if some of the material is …
A.) …relevant to your site.
B.) …something that you can actually do yourself.
Below, I’ll walk you through several ways to instantly speed up any WordPress website. I’ll show you how to do it step-by-step. Then, I’ll review how to identify what types of things might be slowing down your individual WordPress website and what you can do about it.
Watch me review some of these tips here — or read them all below
1.) Caching and CDN configuration will make WordPress sites faster
One of the easiest and most instantaneous ways to improve the speed of your WordPress website is to enable a CDN and properly configure your caching rules.
If you do nothing else to optimize your site or improve it’s performance, enabling a CDN and caching best practices will ensure that the delivery of your site to visitors will be faster than it was previously.
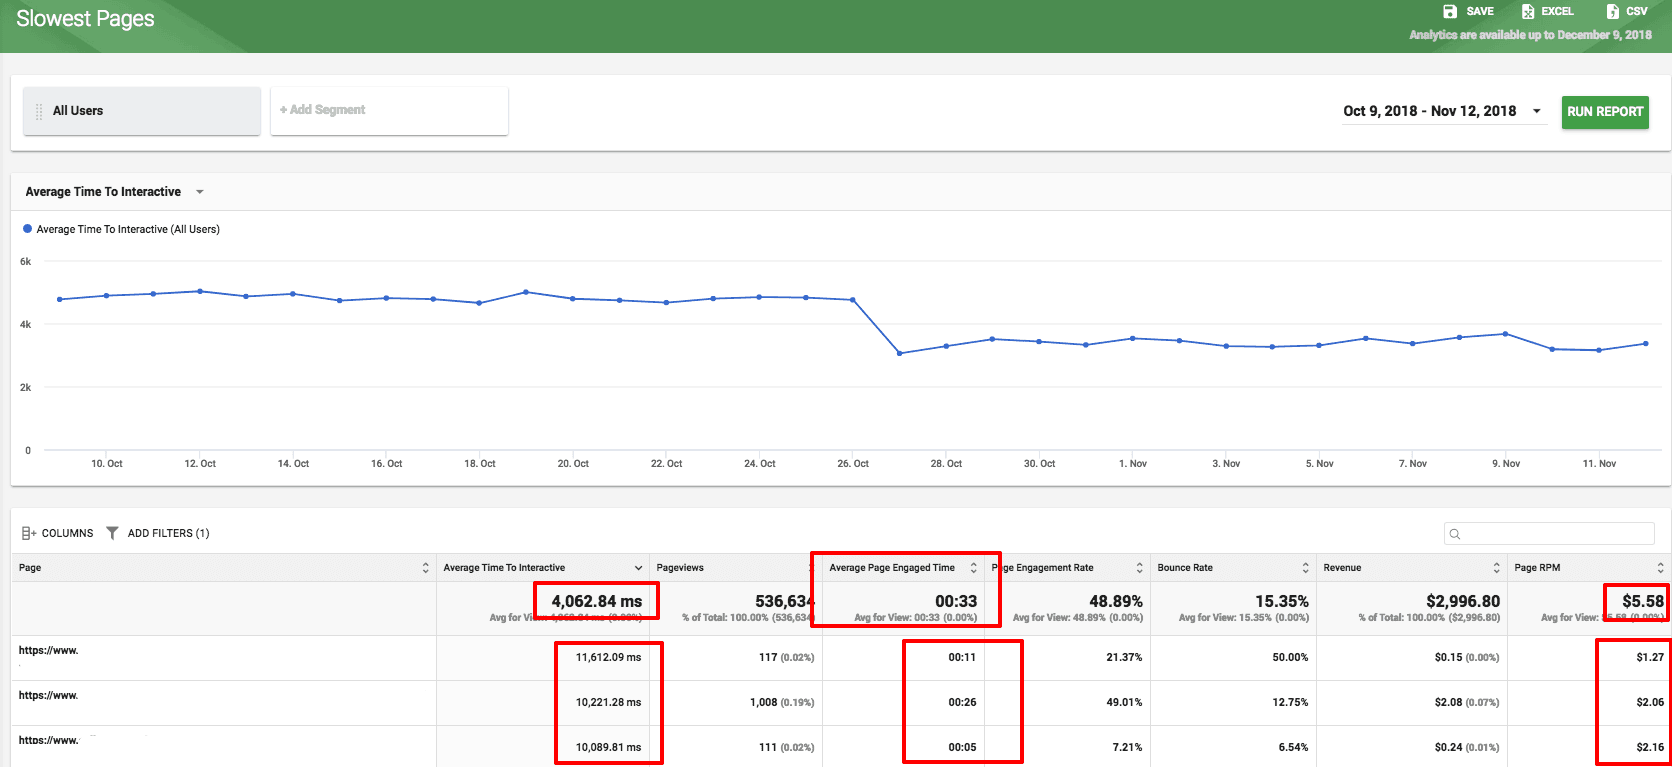
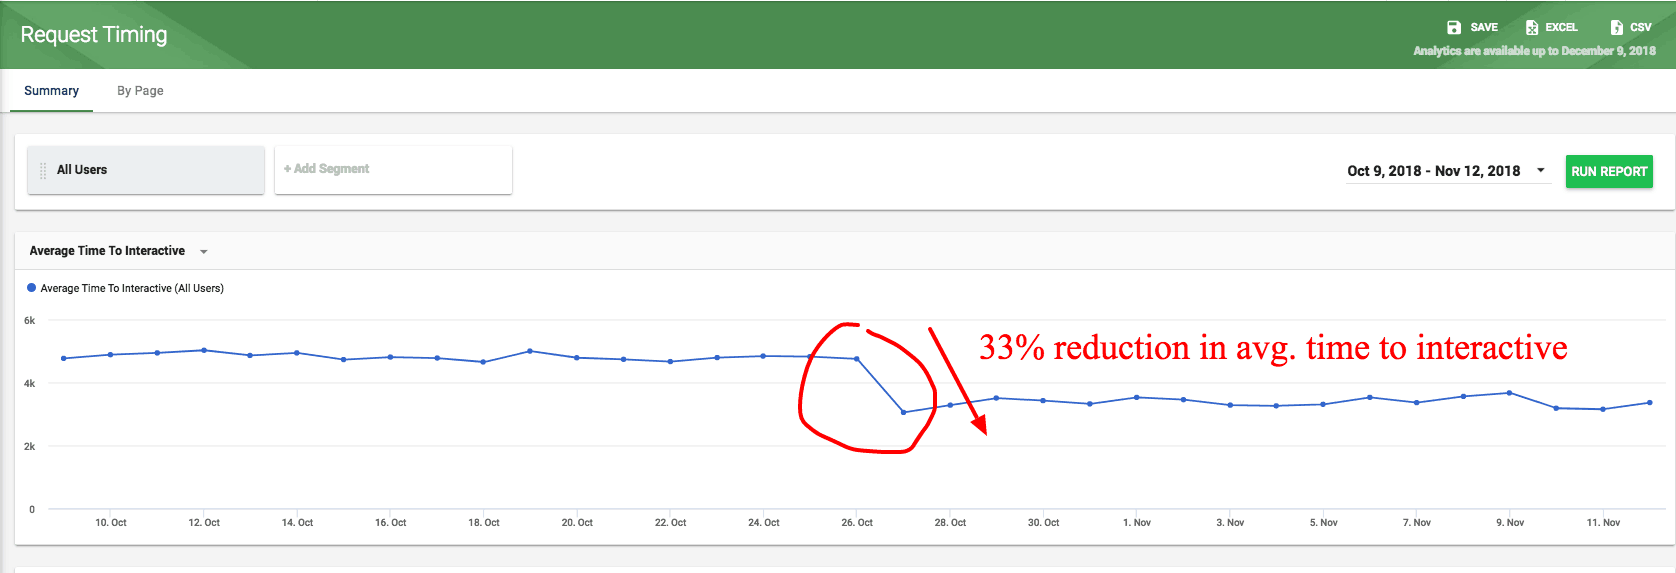
This means that every user will receive a faster experience. It might not always show up on every pagespeed tool on the planet, but it will be noticeable to you and all your users. If you use a free analytics tool like Big Data Analytics, you’ll be able to see how something like this will improve advanced site speed metrics like DOM Interactive (Time to Interactive) when this is done correctly.
Here are 3 ways to do it
1.) Use your host to enable a CDN
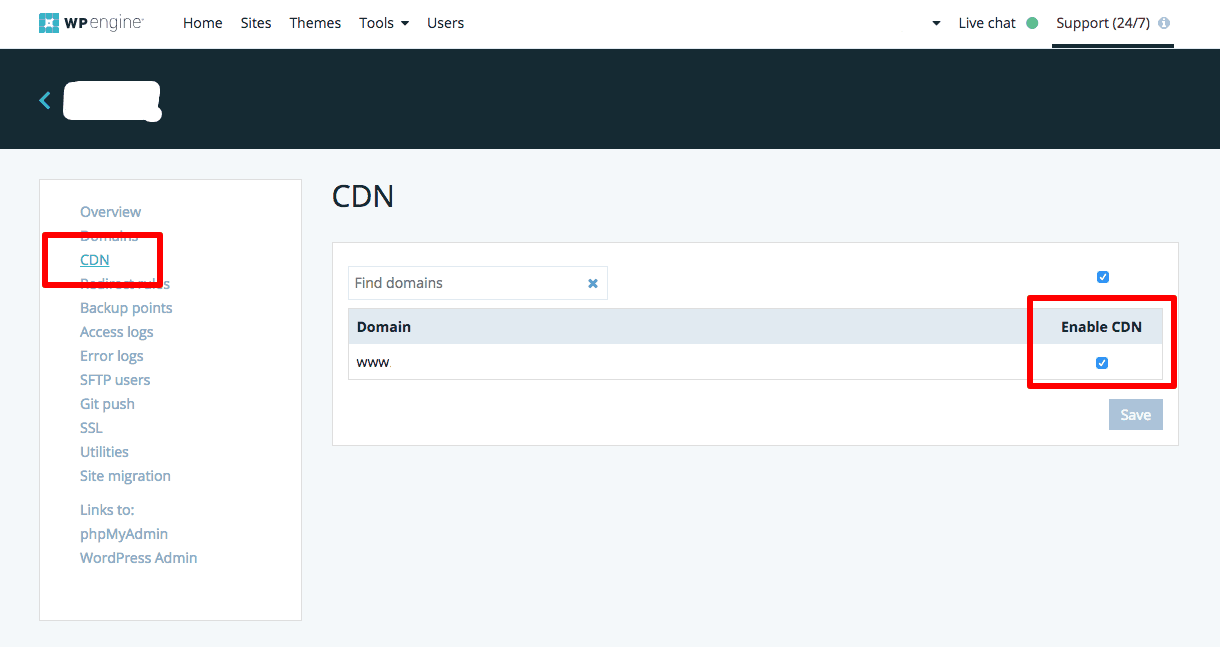
A host, like WPEngine, or a free CDN provider, like Cloudflare, can help you enable a CDN for all your website visitors.
As a quick review, a CDN stands for content delivery network. It allows your site to be distributed to servers around the world so that visitors trying to access your site will be able to access it from the server closest to their location — rather than your host server. This speeds up the delivery of your site.
Most hosts that provide CDN services will provide some kind of menu item and easy setup wizard for you. Many of the CDNs provided by hosts are already configured fairly well, but a free CDN like Cloudflare can offer additional controls that will help you improve performance even more.
2.) Using CDN provider with additional controls
Even if your host provides a free CDN option, many WordPress sites may benefit from using a free CDN provider like Cloudflare instead. The additional configurations from Cloudflare can give you some extra controls to help speed up the delivery of your site.
The steps to using Cloudflare are:
- Create an account
- Generate a CNAME record
- Install an SSL certificate (to take advantage of HTTP2)
Once you complete those tasks, here are some settings to consider when only using Cloudflare.
- Always Use HTTPS: Yes
- Opportunistic Encryption: On
- Onion Routing: On
- TLS 1.3: Enabled
- Automatic HTTPS Rewrites: On
- Auto Minify: Yes for all code types
- Brotli: On
- Mirage: On
- Caching
- Browser Cache Expiration: [depends on how often content on your articles updates]
- Always Online: On
- HTTP/2: On
- WebSockets: On
There are a lot of other CDN providers that you can use that offer free WordPress plugins, like MaxCDN (now StackPath). These will allow you to easily setup an account and configure the CDN directly inside WordPress via a plugin (if this is how you are most comfortable performing these tasks).
However, these types of CDN providers charge for their services and don’t provide any additional value over the free CDNs provided by someone like Cloudflare.
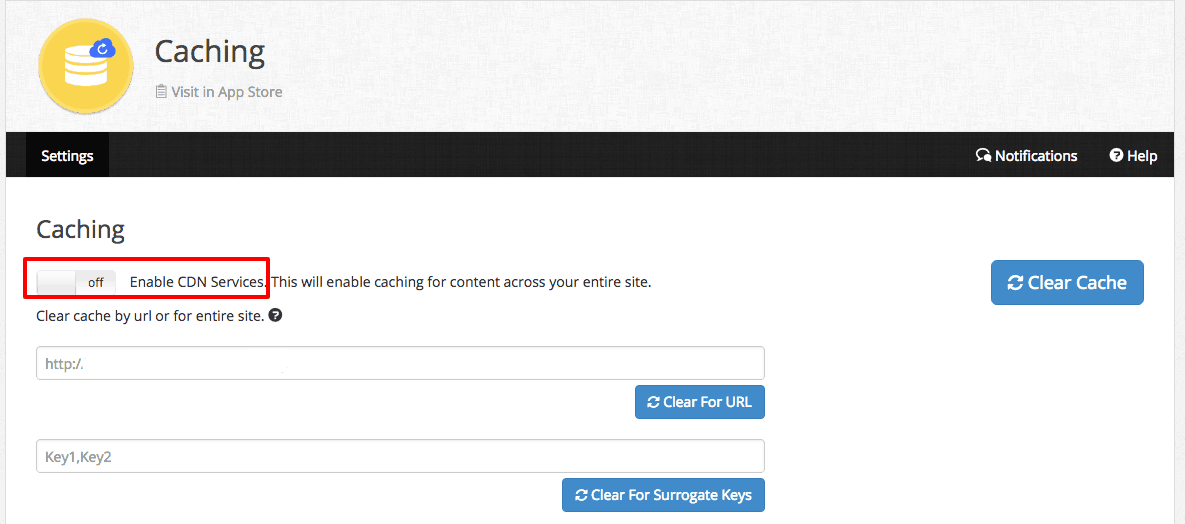
3.) If you use Ezoic, simply turn on The Caching App
By turning on Ezoic’s Caching app, publishers can automatically enable a CDN with the flip of a switch. Additionally, Ezoic will automatically implement many of the best practices and configurations espoused in the settings above for Cloudflare automatically.
If you have specific rules you’d like to set about how long content is cached, you can do this directly through the app interface,
Does the Ezoic Caching App offer any extra benefit if you’re already using a CDN or having caching enabled some other way?
Yes.
The Ezoic Caching App is built to work together with Cloudflare and WordPress configurations. Since Ezoic serves as a proxy and serves different versions of the site to different types of visitors (ad combinations, layouts, etc.) based on previous visitors have behaved, the HTML cannot be cached by Cloudflare or the host, but Ezoic can cache things like HTML in an intelligent way.
This means that Ezoic provides an additional layer of caching that can help optimize speed further when it is enabled along with existing CDN services.
Is that all, just turn it on?
Yes. Pretty much.
However, it is possible that because of a WordPress plugin (like W3 Performance, etc.) you may have cache headers enabled on your site that override the best practices delivered through the Caching App. Ezoic will always defer to the rules on your site (to ensure there are no conflicts).
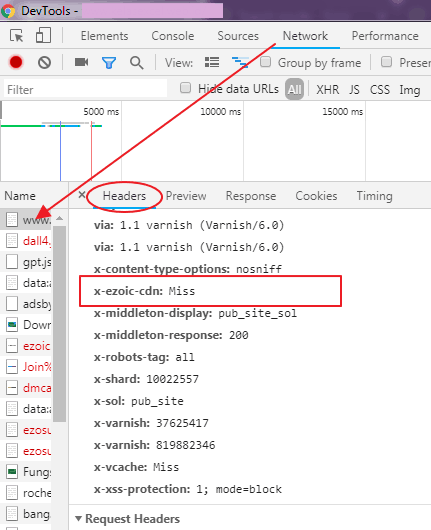
The best way to determine if Ezoic’s Caching app is working properly is by looking at the HTTP headers in the developer tools in Chrome. You can read more here. A “miss” means that the rules are being overridden and the Caching App is not working properly.
Ensuring that the Caching App is working properly is very important; as it is an extremely sophisticated tool that will allow Ezoic to learn from visitor behavior and optimize your site’s cache in a personalized manner.
Lastly, I like WP-Rocket a lot too
I talked about how to use WP-Rocket a little bit in this post.
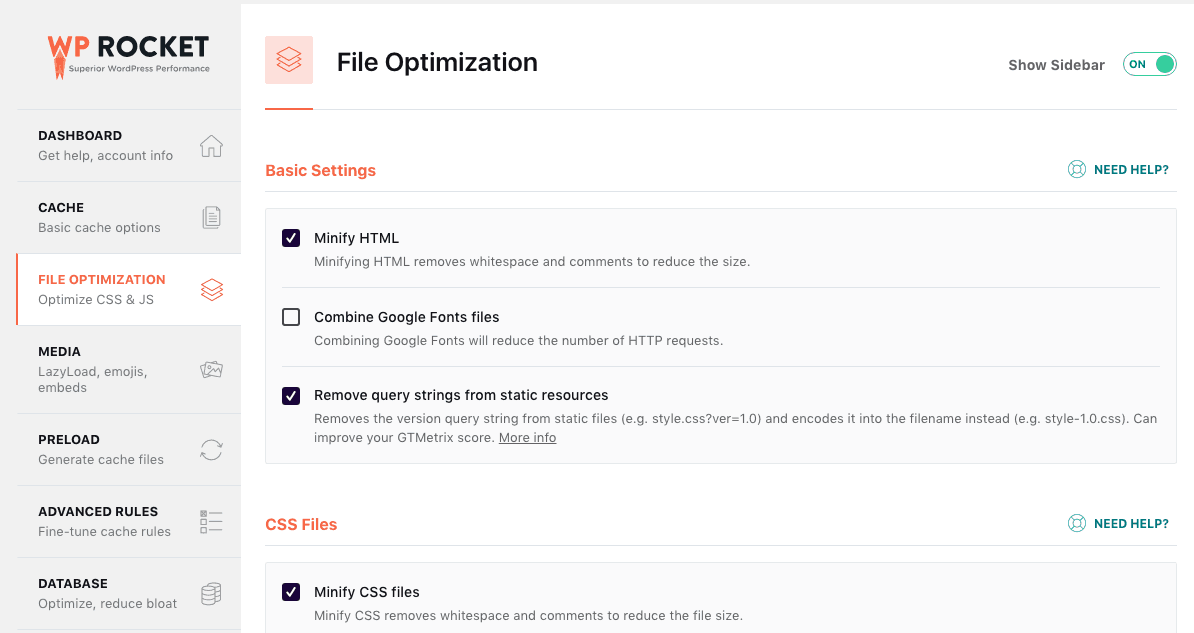
While you may not need to turn on some of the caching functionality, you can use it to set HTML, CSS, & JS minification and deferment rules that align with exactly what Google and others are espousing.
This is a paid plug-in but is far better than many of the free caching and minification plug-ins that often break the site’s theme or are difficult to configure properly.
2.) Eliminate common WordPress plugin slowdown issues
How many WordPress plugins do you think the average WordPress site has?
20.
That’s right. Twenty WordPress plugins is the average number of plugins that the typical WordPress website has installed.
Plugins are one of the most useful and necessary components of WordPress development. But, they can also cause problems and are often the source of major WordPress website slowdown. Optimizing the use and deployment of your current WordPress plugins can increase your site speed and improve the performance on your site.
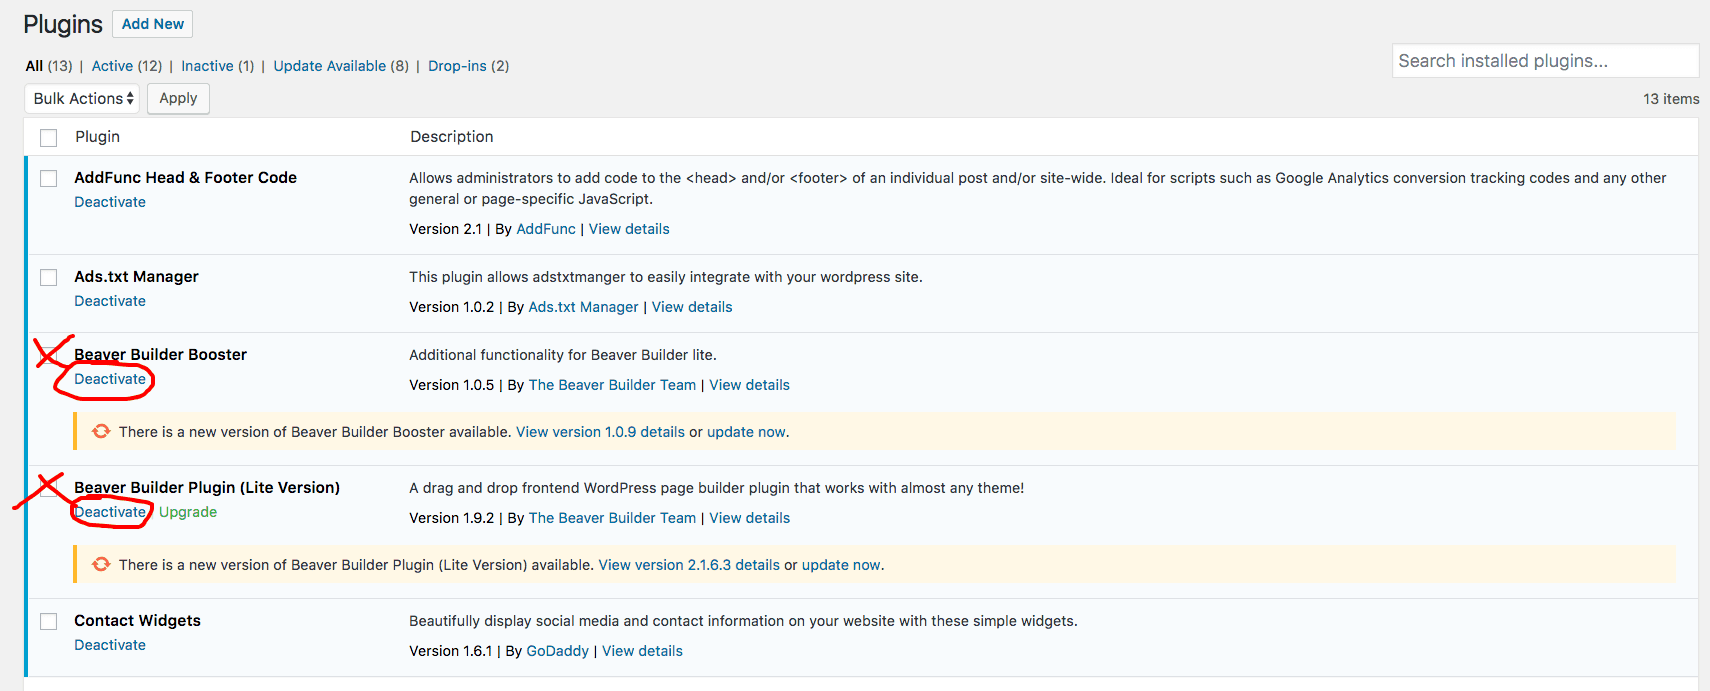
Get rid of the plugins that aren’t enabled
Plugins add additional CSS, JavaScript, and HTML to your website. Even if these codes are optimized and delivered well (many plugins are very poorly coded and bloated with excess JavaScript), they can add to page load times.
Plugins that aren’t activated have no benefit but are responsible for database tables and data. Deleting the de-activated these plugins from your site is a no-brainer.
Get rid of the plugins you don’t need
Often, even if a plugin is enabled, you may not be using it. It is extremely common for a plugin to be installed and activated by default by the theme provider you selected back when you set up your WordPress site (or changed to your latest theme). These are often unnecessary and can be uninstalled without any issues.
Often, these are “theme builder” plugins that are never used. Some of these are built very poorly by their developers and cause major slowdown by adding excess CSS to your website.
You’ll want to be careful not to remove a plugin that is actively helping part of your site work, but in many cases, publishers install plugins for a task then realize it doesn’t work the way they wanted and forget to uninstall it or delete it. It is also common for plugins, like Hello Dolly, to remain installed since the site’s launch — despite the fact that they are never used.
Active plugins are often the top cause of delayed page loading when you dig into pagespeed reports and tools. A certain script from the plugin is making a call out to the plugin creator, and when this response time is delayed, the page loads slower. The times for some of these calls can vary; which is why site speed measurements may vary on your site every time you try to run it through a tool.
Deleting these plugins in WordPress might not be enough
Often after a plugin is deleted it can still leave database tables behind on the site. This means that the data created from the plugin still exists in your site’s database; adding to the overall size of your site (think of it as some extra fat in your website’s midsection).
After you delete a plugin, you can go into your host and find your phpMyAdmin (often under cPanel) to delete these leftover remnants.
Even if databases and this sort of work scares you a bit, this is pretty easy to do.
Simply navigate to phpMyAdmin, select databases, and click on the database that says wp-[yoursitename] (there will likely only be one or two). Search for files that say, wp-[name-of-the-plugin-you-juect-deleted], and then select those files and click DROP.
This will delete those tables in your database and help your site stay nice and lean.
Lastly, keep the plugins you use up to date
Not only can out-of-date plugins cause your site issues, but they can also be the cause of poor WordPress site speed. If a certain plugin has been improved, optimized to work better with a new version of WordPress, or modified to work better with popular themes, you’ll want to be sure that those changes are applied to your site.
Quick Note: Make sure you backup your site before updating your plugins. Often, plugin updates can conflict with other parts of your site and the site could go down in the worst case of these scenarios.
By deleting unused plugins, removing the ones you don’t need, updating the ones you use, and eliminating all the unnecessary code and data they have added to your database, you can safely sleep at night knowing that your WordPress plugins are fully-optimized for speed.
This may seem simple (or maybe it doesn’t), but by doing all of these steps you can ensure your WordPress site is as fast as it can be.
3.) Optimize image delivery to speed up WordPress page load times
I’ve talked about optimizing images for website speed before. It is really one of the easiest ways to speed up an individual page.
One of the biggest flaws WordPress publishers make is taking a broad look at their website’s speed. A WordPress website is made up of lots of individual articles (pages and posts). Every one of those pages will have a slightly different load time.
Images are a major factor in that load time. Reducing image size and optimizing delivery can shrink the overall size of a site and speed up the average page load time quite a bit.
Many publishers are wary about optimizing images because they fear that optimizing the images will reduce their image quality. No one wants to sacrifice the quality of an image — and potentially the quality of their content — for a few KBs on a page.
How to optimize images without losing quality
There are a few really simple ways to start optimizing the images on your WordPress site’s pages and posts. The first two don’t have anything to do with compression or changing the quality of the image.
1.) Ensure the image file type is a JPEG or PNG (JPEG is better)
JPEGs are typically one of the best image file types for the web. They are recognized in every browser type and are naturally one of the smallest image file types available.
They are even smaller than a PNG. If you convert a PNG image or GIF file to a JPEG, you will almost always find that it is smaller. You will also notice that the quality remains completely intact (unless you want to pull out a microscope).
Here’s a free image converter. Or, you can always use a software like Photoshop.
2.) Reduce the dimensions to below 1000px wide
There are very few device screens that are more than 1000 pixels wide. In fact, most mobile screens are less than 650 pixels wide. With the majority of web traffic now being mobile, it doesn’t make sense to have images much larger than 1000 pixels on your site.
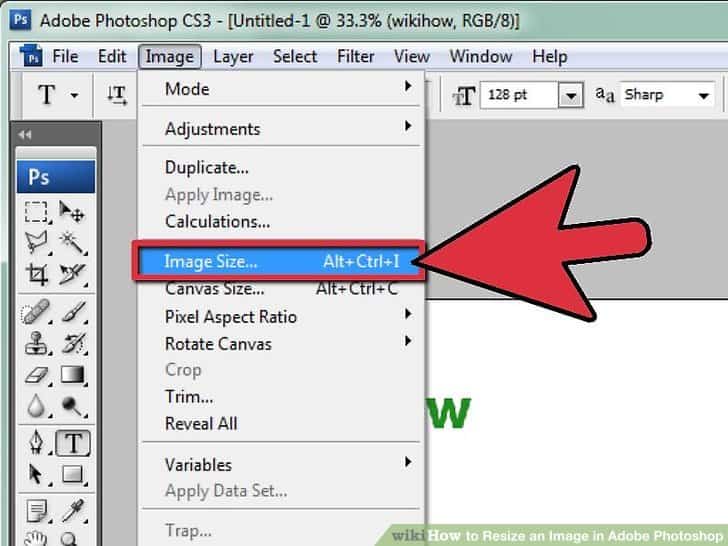
Using free image resizing tools, or Photoshop, you can simply make the dimensions of your images smaller and reduce the overall file size.
Making an image file a JPEG file under 1000 pixels wide will typically reduce the file size quite a bit without even compressing it.
How to properly compress and optimize images for the web
Ok. This is really important…
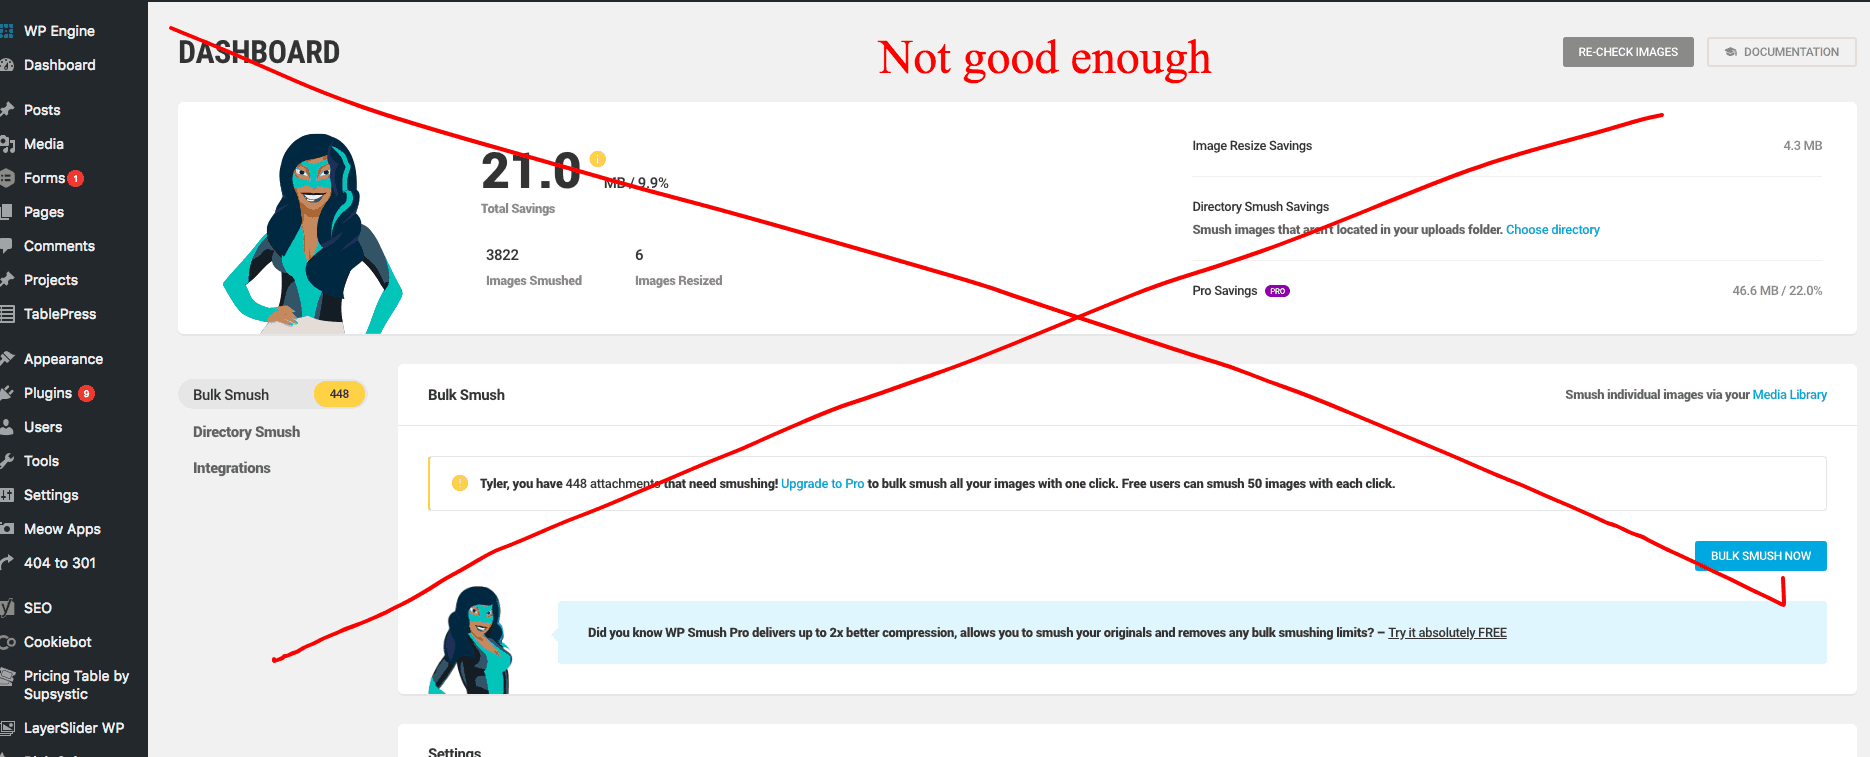
ANY PLUGIN YOU USE TO OPTIMIZE IMAGES OR COMPRESS THEM ISN’T GOOD ENOUGH!
I know. It would be great if optimizing an image was really as easy as simply installing a plugin like Wp-Smush. Unfortunately, these plugins provide very little help in reducing an images files size.
The biggest ways to reduce image file size are what we outlined above:
- JPEG
- Under 1000 pixels wide
No plugin will do that for you automatically. After you’ve optimized the size and file type, it is worth it to losslessly compress the file. You can compress your image files without harming their quality.
While there are ways to reduce the quality and make the image really, really small. In most cases, you can leave the image to where it looks nearly identical to the visitor while cutting the file size by 70-80%.
You can do this in Adobe Photoshop by uploading the image, going to File -> Export -> Save for web (legacy), selecting JPEG, and then choosing “medium” or “high” in the quality settings.
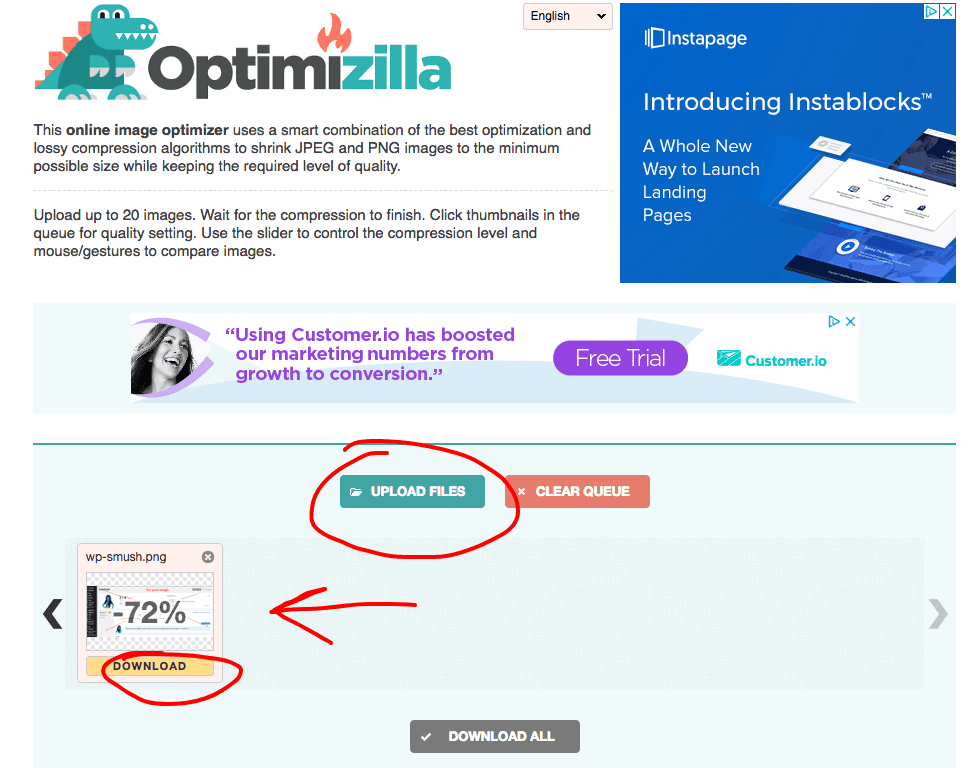
If you don’t have Photoshop, my all-time favorite free image compression tool is Optimizilla. It allows you to upload a JPEG or PNG file and then compress it by 70-80% without loss of quality. It even gives you the controls to reduce the image further if you can stomach a small reduction in image quality.
You can also bulk upload to this tool. This way, you can download all the images from an article, upload them to the tool, then re-download them, and simply replace the images in your article with the new compressed versions.
“But Tyler, I have tens of thousands of images. Where do I start?”
If you have the unfortunate circumstance of having an entire WordPress website filled with images that need optimizing, there is a pretty good rule of thumb on where you should start.
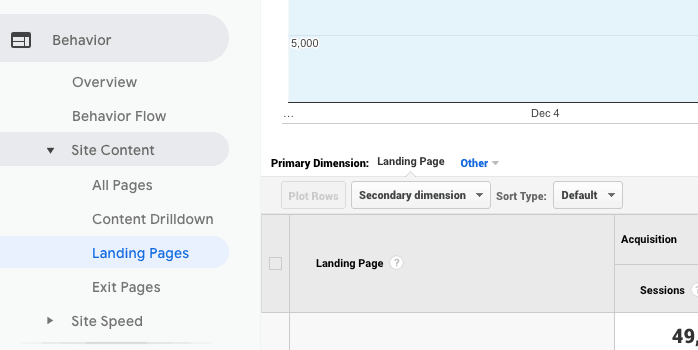
1.) Start with your most popular landing pages.
Using Google Analytics or Ezoic’s Big Data Analytics, you should be able to clearly see the most common pages for visitors to land on when visiting your site. Landing pages are more important than pages because they are where your visitors start their session on your site.
If a landing page is slow, it is possible a visitor will bounce or leave without visiting additional pages. This is why you want to ensure your top landing pages are as fast as possible.
You can increase pageviews this way and potentially increase EPMV and ad revenue for these pages.
2.) Then, move to your slowest pages.
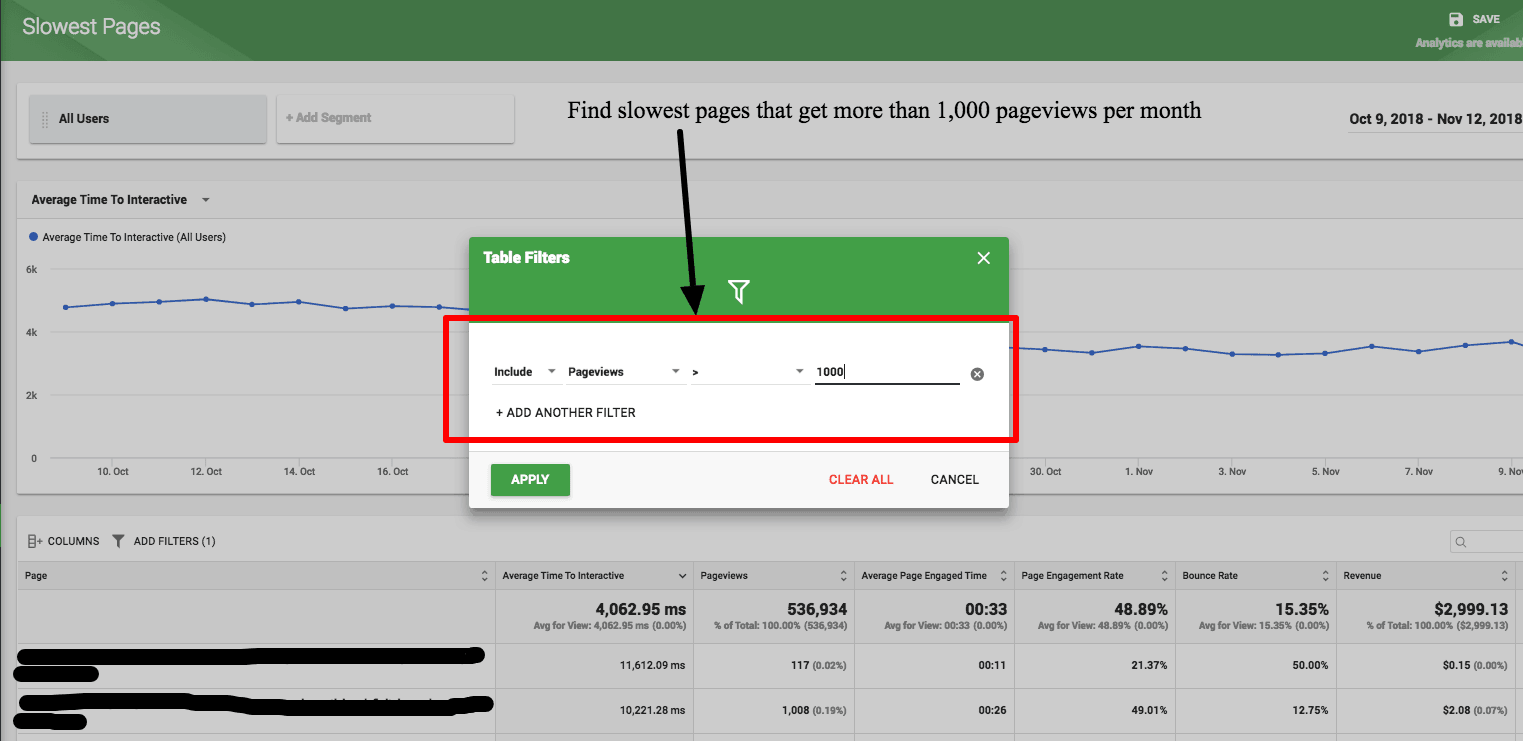
Measuring the time to interactive is probably one of the best ways to determine which pages are actually the slowest to your visitors. Finding your pages with the slowest time to interactive is is the best place to start.
Images are likely a contributing factor on these pages — especially if they differ greatly from your average page’s time to interactive.
By identifying pages that receive a lot of pageviews that are quite a bit slower than your average pages, you can figure out which pages are most likely to benefit the most from having the images optimized. This could allow you to improve the SEO and visitor experience metrics for these pages.
Just give me a summary of optimizing images…
Ok. Here is the breakdown for optimizing images:
1.) Convert files to JPEGs
2.) Resize and scale the images so that they are less than 1000 pixels wide
3.) Compress the images so that they are less than 100KB
That should be enough to so that images are not slowing down your site and easy for all visitors to load quickly on your WordPress website. You can start by focusing on landing pages and the pages with the slowest time to interactive (DOM interactive).
4.) Ensure a fast WordPress theme and reduce code bloat
Many publishers hate the idea of using a simple or common WordPress theme, but the truth is that many of the simple and most commonly used WordPress themes are the ones that are built the best.
Many of the custom WordPress themes or fancy/unique themes that are available include excess CSS and Javascript that cause the WordPress site to load slower.
This is actually something a lot of WordPress site owners aren’t initially aware of. Your WordPress theme can actually cause your site to be faster or slower.
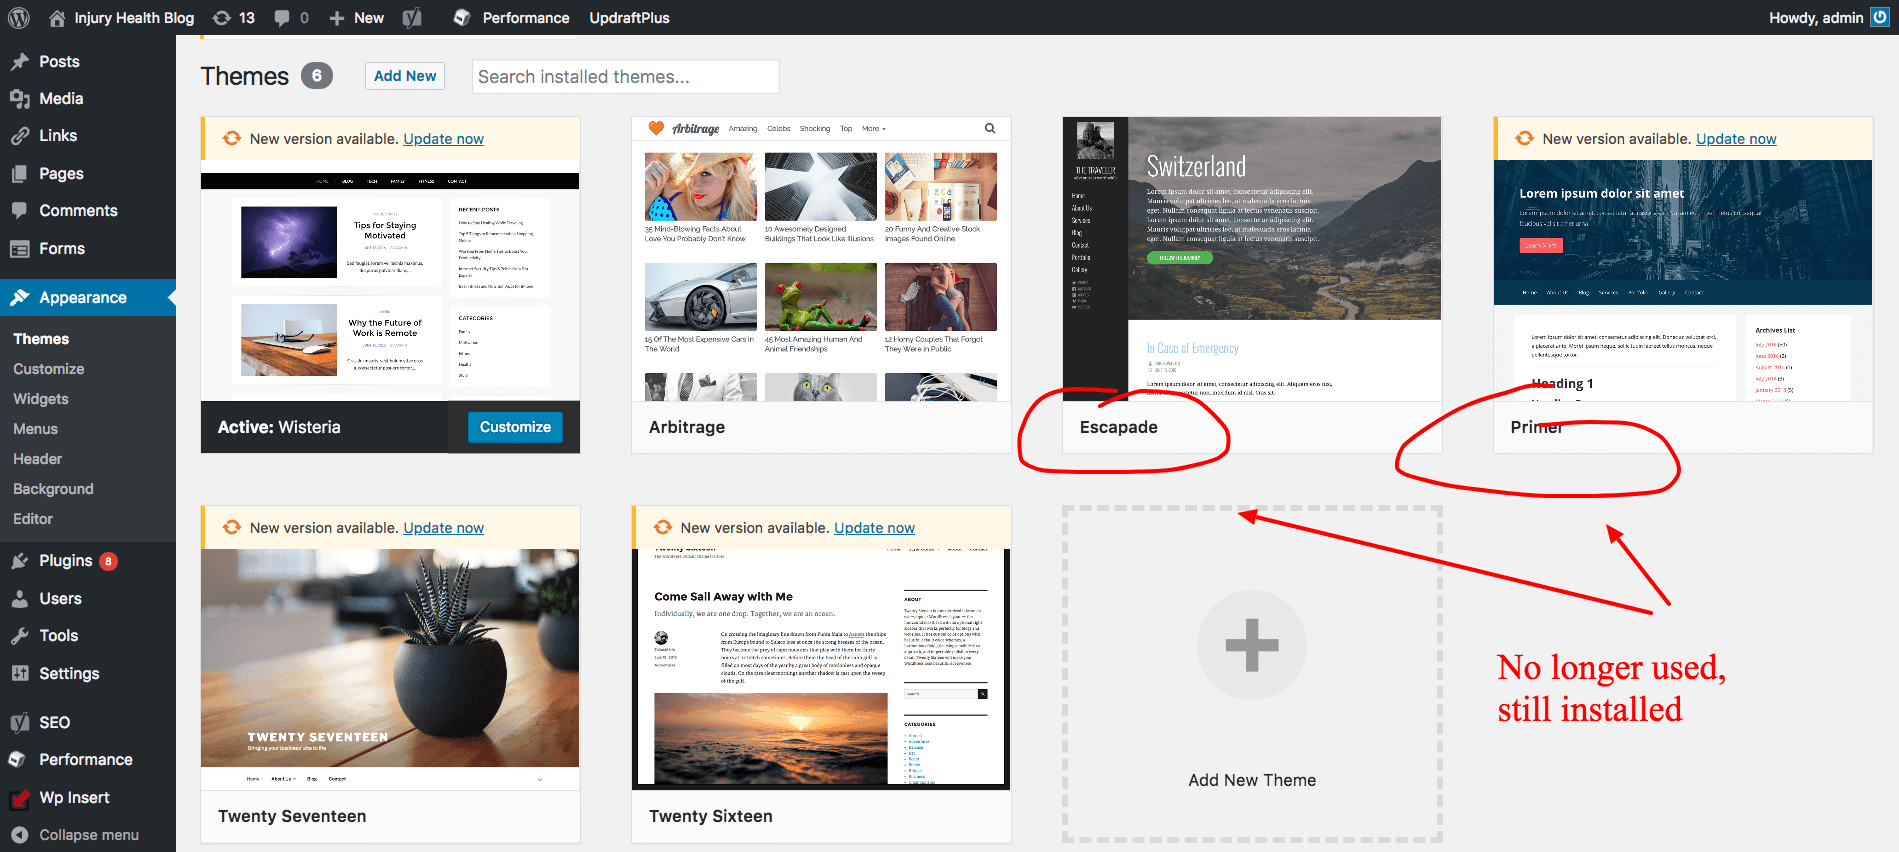
What’s more, if you have changed themes and still have the old theme installed — but not activated — some of that bloated code may still be living on your site taking up room in the database and forcing your site’s visitors to load unnecessary data.
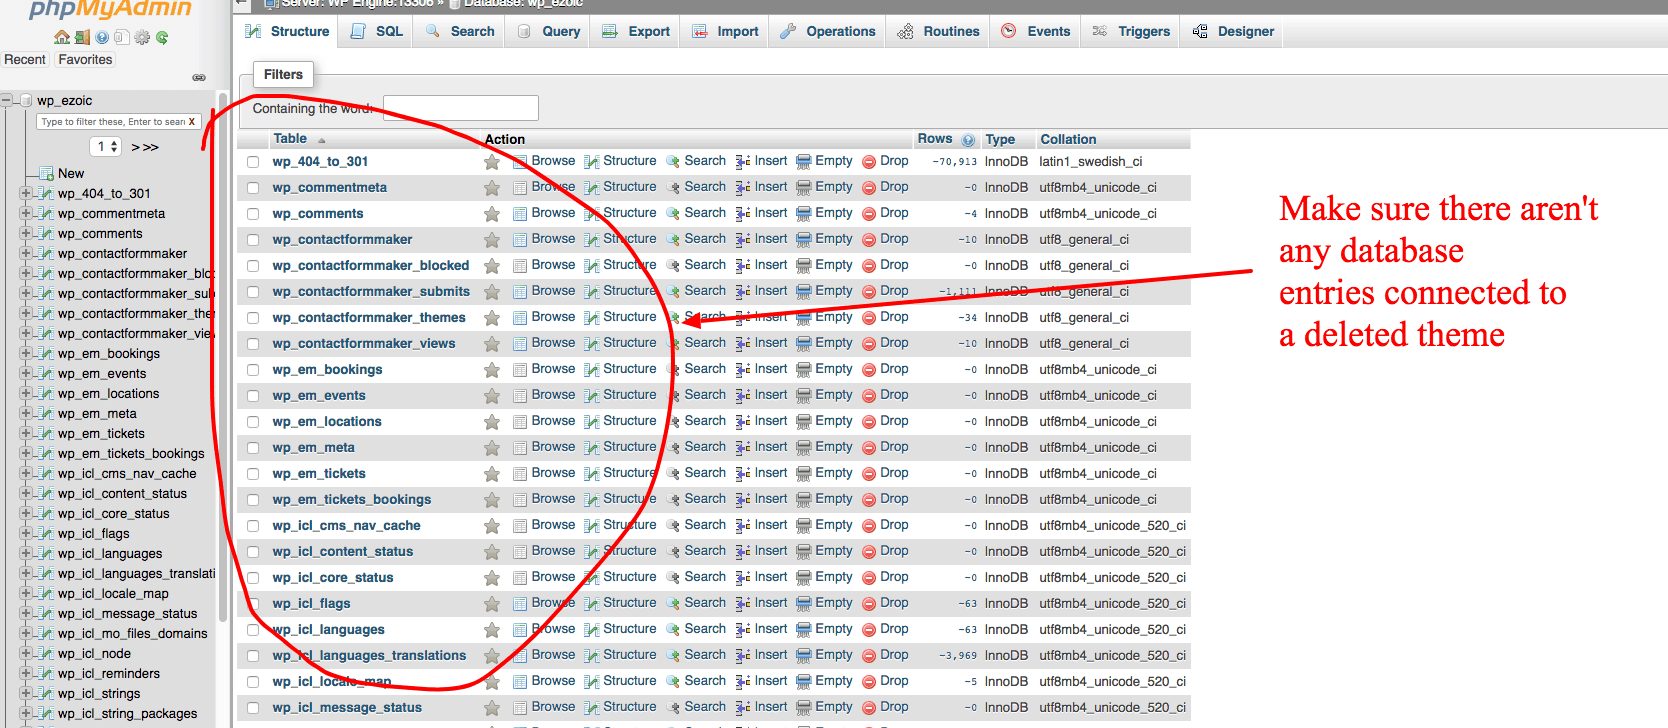
In the same way that we needed to go into phpMyAdmin to ensure that we eliminated any database tables created by the plugins after we deleted them, we’ll need to do the same thing with any deleted themes we get rid of.
This helps us ensure that any data that these themes added to the site are eliminated and not forcing visitors to load unnecessary code when visiting. This is another simple way to clean-up your site a minimize bloated code.
Simply go into phpMyAdmin, click on databases, select your site’s database, and look for any files that have the name of a deleted theme attached to them. Backup your site first, then “drop” any of the files that appear to still be there from the deleted themes.
5.) Kill linked fonts and use native fonts instead
Lastly, another really simple thing you can do to shave some load time off your WordPress website is to eliminate linked fonts from your site and rely on native/system fonts instead.
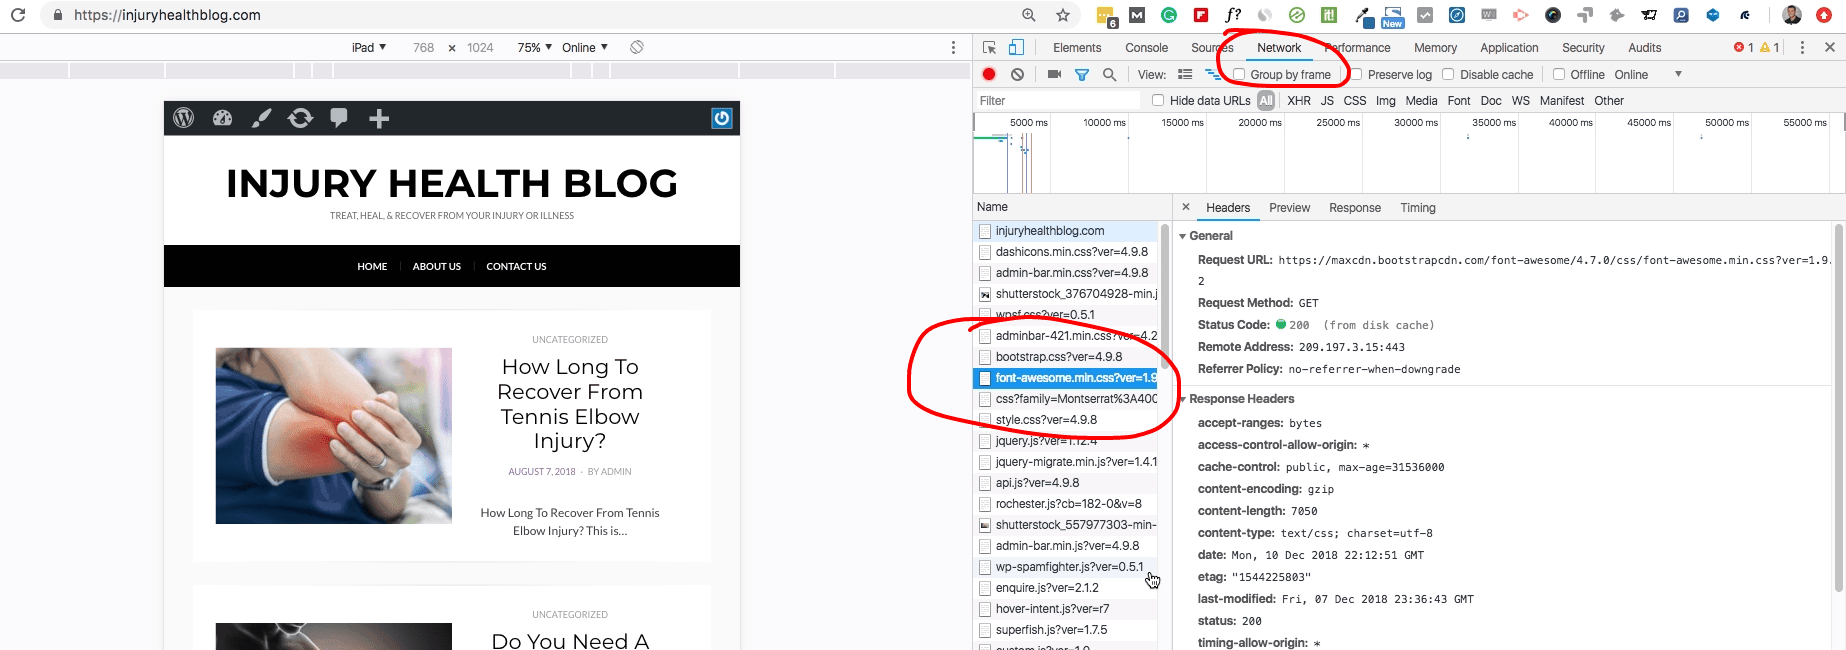
A linked font is something like, Google Fonts. These fonts offer a lot of cool style options that most publishers prefer to keep; however, they do contribute to slower page loads times. If you go into the waterfall (see more on this at the bottom of this article), it is not uncommon for WordPress website owners to find Google Font calls to be one of the longest callouts of all the calls on the page.
Font file sizes can get pretty large; especially if a developer has used multiple typefaces for different kinds of fonts. For example, on one of my personal blogs, the linked fonts totaled nearly 7.3MB.
If you’d like to address page speed on your WordPress website to the greatest degree possible, you should look into using native fonts instead. Native fonts are fonts that are already installed into the visitor’s device or browser.
While this may limit some design elements of your website, it will improve the speed.
Common system/native fonts are:
- Arial
- Times New Roman
- Verdana
- Segoe UI
- Roboto
- Ubuntu
- Cantarell
- Droid Sans
- Helvetica Neue
- Sans-Serif
You’ll also want to be sure that you eliminate any linked font callouts in your CSS, or that have been added via a WordPress plugin (i.e. Google Fonts plugin). This is not always easy with all themes and is probably reserved for publishers that are a bit more technical in nature.
Identifying what is slowing down your WordPress website
Everything above can be used to make your WordPress website faster.
Any WordPress user can do those 5 things; however, every site is different and may have multiple factors that could be contributing to a less-than-optimal site speed.
Website speed testing tools are notoriously bad at providing an objective — or even helpful — metric for evaluating website speed. Many are simply calculating TTFB (time to the first byte); which even Google has said is not the best way to measure speed.
Google’s Pagespeed Tools was recently updated, and it is really unhelpful now, telling just about every website it is too slow. Most publishers are left wondering, “what should I do?”
Google’s direction inside the tool is directed more at developers than actual publishers. Using the info above, you can handle many of the issues that may be plaguing the site, but for other things, you need to understand the actual cause of what is slowing down your site.
I wrote a deep dive into how to actually measure speed and evaluate what is slowing down your website here.
The main place to look when evaluating what might be slowing down your website is in Chrome’s Developer Tools. Simply go to your site in a Chrome browser, right-click, select Inspect, and then navigate to the Performance tab.
In many cases, there are scripts that are calling out from the page that are extending page load times. This could be because of a social media widget or some other unique tool that you have installed on your site. You could then look to see if you could potentially adjust the loading rules associated with these scripts (i.e. asynchronously load this info).
Adjusting when a script loads is a good way to improve the performance of your site when you’re aware of how that rule might affect visitors.
The final word on increasing WordPress website speed
Website speed is being preached from a lot of different industry platforms. Google is obviously one of the most vocal.
Many publishers believe that increasing WordPress website speed, even a little bit, will allow them an edge in SEO or revenue performance. From monitoring thousands of sites, it’s safe to say we haven’t noticed a significant improvement in website search rankings when they make relatively small speed improvements. However, slow sites that are able to get their site speed improved to above-average generally see some improvements.
Ultimately, the focus of publishers should really be on the visitor’s experience. If your site is fast enough for them, you’ll see it reflected in things like bounce rate and session duration. As you make changes to your site to improve its speed, it is very important to keep an eye on these stats. These will ultimately tell you how you’re doing.
Questions, thoughts, comments? Leave them below.




Hi, Thank you for the detailed and informative post. Just enabled cach app, more info about cache setting values will be greatly appreciated.
Hi Tyler,
Thanks for the informative post. Especially the part where you explained why most of the website speed testing tools are notoriously bad. I never knew about that and placed a lot of trust on them.
One thing I want to know about is that does Ezoic provide speed testing feature? I thought it was a platform for publishers and advertisers?
Hey Saad, the tools are not very good. webpagetest.org is one of the better ones, but few offer real insights into what will actually make a page faster (i.e. actionable info) unless you’re a developer (even if you are the info is not necessarily correct or intuitive).
Ezoic is platform for publishers, not advertisers. We offer a free CDN and Caching app that allows publishers to implement many speed improvement elements on their sites. We will soon have a speed testing application that should help publishers better decipher some of this.
This is good stuff. really thorough and in-depth. I do have a concern about images being below 1000px. My current theme width is 750px. I double this to 1500px for retina devices. I did a test and it makes a different, especially on desktops with retina. When I saved out 750x compared to 1500x, the 750px image is blurry and nowhere near as sharp as the 1500px image. As a designer it’s pretty glaring to me, however I realize not everyone will even notice or care and so it may be a good idea to scale down images, regardless of retina devices or not.
Thank you for the informative article! I hurried to delete all deactivated plugins I’ve haven’t used for years and found terribly many. Hope to see some speed improvements… I’ve always thought Smush is a good plugin to optimize images and you can also do that in batches for all your images. Maybe I’m wrong?
On my website, I am using Riot to optimize images. It works very wel. But thing I need to understand is the NewsPaper theme by TagDiv perfectly optimized for better search engine traffic? To improve traffic, I have already started using Cloudflare CDN. Perhaps I need to change by hosting provider from shared to dedicated to VPS atleast.
Smush will not be enough to optimize any images. This is one of the biggest errors that WordPress users often make.
You likely need to resize and manually compress most of your images. If you have not done this intentionally, there is a very good chance most of your images are over 100kb (which is my general threshold for too big).
Wow! I have spent almost an hour on this article trying to learn ways of site optimization. I’ve learned lots of tips and new techniques on site optimization from this article. I never knew that inactive themes could potentially lag a website loading speed.
Thanks for sharing.
This is very useful article – espacially about CDN configuration.
Theme which has dozen layouts and every piece of functionality – I am sure client or buyer wont use everything included! So good way is to hire dev or write not bloated theme that we will have full control. Then, any custom modification will be easier to achive – without a plugin also.
A very informative article. One point that caught my eye was to use native fonts. I think this isn’t really a solution, what we need to be doing is font swapping – just because fonts don’t allow for speed optimisation doesn’t mean we should discard them completely.
Just a thought.
I do agree with Andy, font swapping is a good solution.
Apart from that I use ShortPixel for image optimization and I’m quite happy with the results.
This article is very helpful. I was able to increase my blog speed even without using CDN. I’ll follow your CDN configuration guide to make it even more faster. I’m really excited. Thanks for your help.
Great tips here! It’s incredible how many methods & plugins exist to help solve problems that WordPress website owners face. A great tip I personally found to speed up WordPress was removing unused Javascripts which WordPress adds to the header and the footer. This sped my site up significantly, especially removing Jquery since I wasn’t using it on my site anyway.
This article is very helpful. I was able to increase my blog speed even without using CDN. I’ll follow your CDN configuration guide to make it even more faster. I’m really excited. Thanks for your help.
Hello,
Great tips to boose web site speed. am using Autoptimize plugin to speed up my WordPress blog. also using the W3Total Cache plugin.
Great tips to speed up WordPress website but I want to know which cache plugin is best when we are with Ezoic or no need to install a cache plugin on the website.
I am using WP Rocket, WP Super Cache and LS Cache on most of my websites.